The following article covers:
Best cameras for creating online courses
Best microphones for creating online courses
Best cameras for creating online courses
Online Course Equipment Based on Your Budget
All-in-one platform for launching the course
Do I need the most expensive equipment in the world to create great online courses? The short answer is no, not necessarily. Creating a course that sells well without expensive equipment is feasible. Your students are purchasing the course for the contents and your expertise, after all.
However, if you are looking for affordable online course equipment to add quality to the production process, we have the best equipment solutions for you based on the recommendations of the users and creators. We have categorized all the gear and equipment you may need while putting together a course, such as cameras, microphones, special equipment, etc.
And if have already set a budget, you can certainly find recommendations for every budget. Please note, that the pricing information presented is true to the moment of writing and can change.
Now, lights, camera, action, and let’s go!
Best cameras for creating online courses
First and foremost, you need to pick a good camera. These are the criteria we paid attention to for camera recommendations:
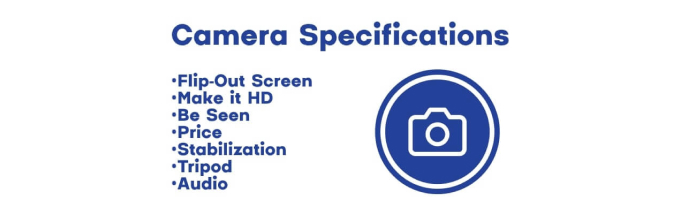
- Flip-Out Screen. The ability to see the frame while recording yourself — especially when you don't have a camera person.
- Make it HD. Of course, the good quality of the frame — preferably starting with 1080p — is something you can't go without.
- Be Seen. If you are the one filming yourself, your camera should have the ability to focus on your face automatically. You don't want to look blurred.
A few things that won't matter too much:
- Stabilization. If your course includes trip fields, for example, showing an archaeological site on a video, you may need stabilization. Otherwise, not so much.
- Tripod. Again, you probably won't need a camera that comes with a tripod if you are shooting from an office. You can buy a separate tripod or just put your camera on a pile of books.
- Audio. There are cameras that have an internal audio-recording possibility. The quality of such recordings is usually not the best, so investing in a good microphone is easier.
This guide will help you see the features of the presented models and choose yourself. Let's have a look at three cameras and judge them by the criteria:
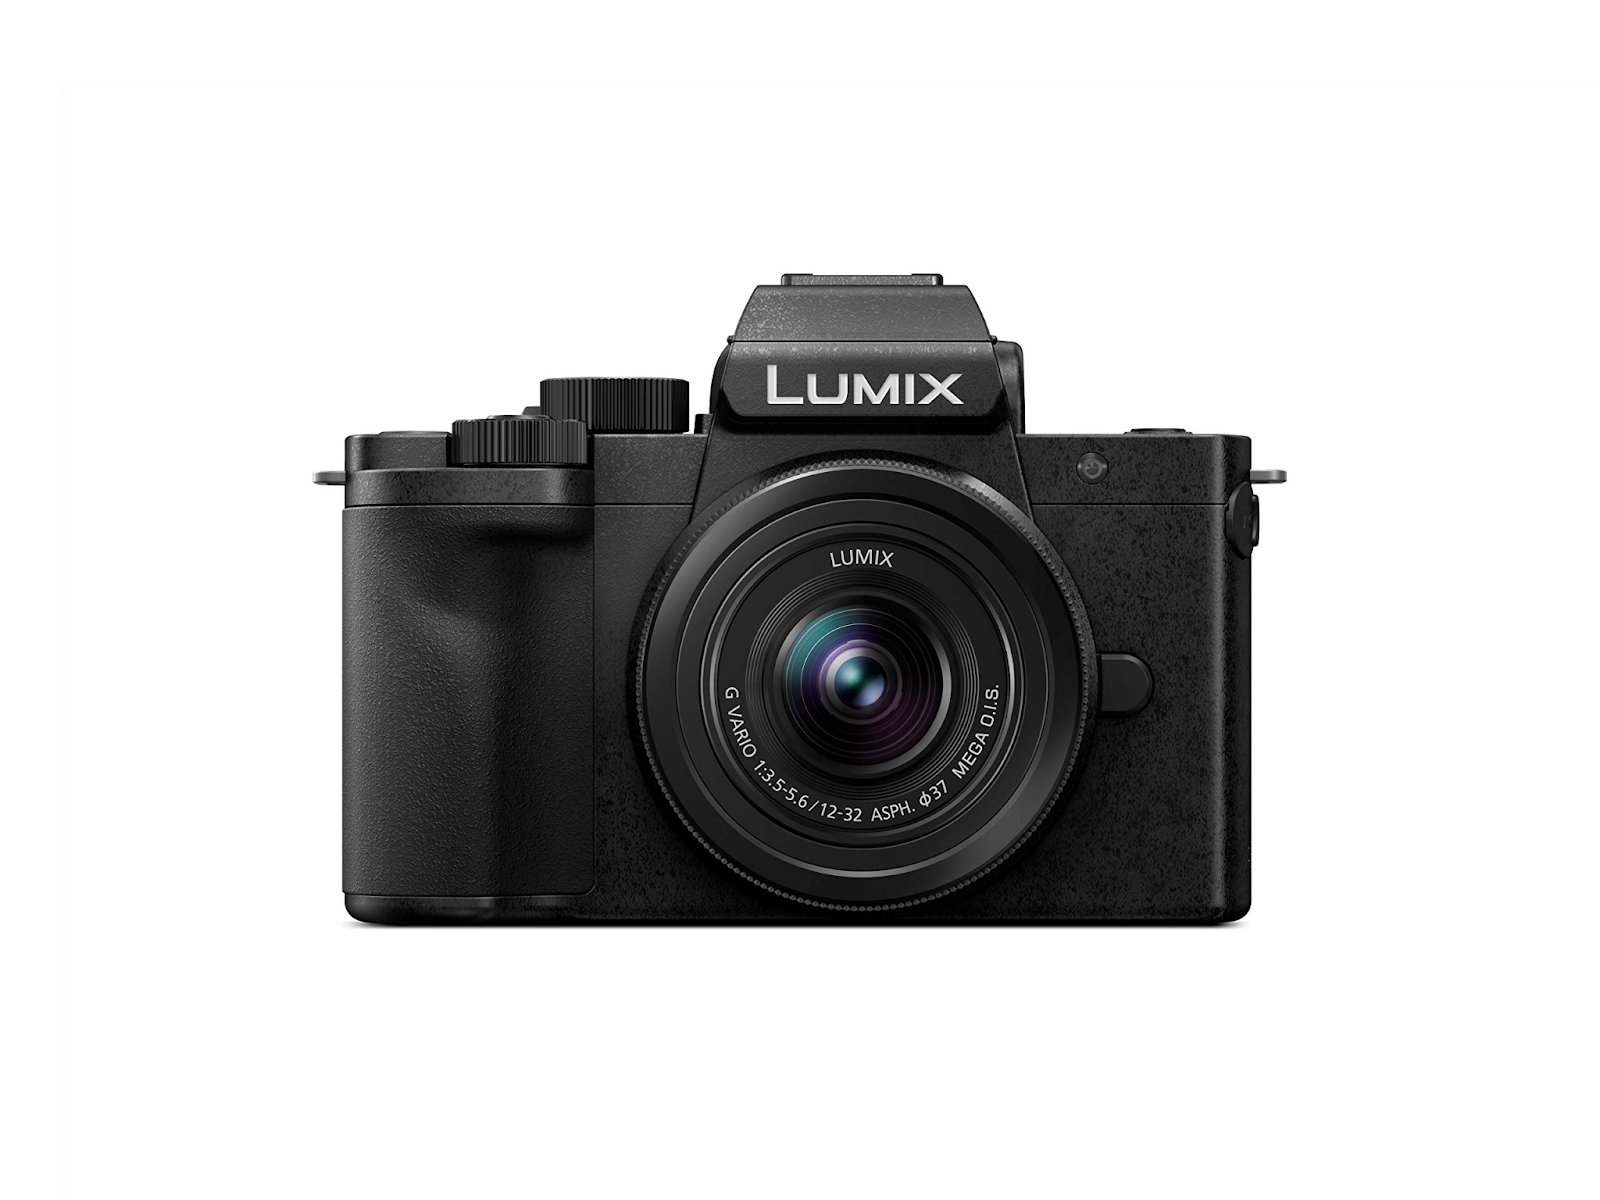
Pros:
- Does not require much space.
- Has a flip-out screen.
- 4K video quality
- Has a tripod
- Autofocus.
Cons:
- Relevantly high cost.
- Is reported to have slight problems with focusing.
Pricing: $575
You can get this camera on Amazon. Here is how one of the users described their experience with it.
“I wish this camera did not auto stop filming after twenty minutes. With that said I have been able to make some hour long YouTube videos with this camera. The battery last about five hours filming straight I know this because I have gotten so into what I was doing that I would look up and the red light rim around the screen is flashing and the battery icon is blinking.
On that note I love the fact the screen can flip over I like to watch myself while I film. In editing it is noticeable when I have had to start with the lumix G100 and finish with my snap touch or use all three my cell phone the lumix G100 and my snap touch. My snap touch camera has the worst picture filming, my Galaxy j2 core is in the middle and this camera the lumix G100 has the best filming quality.”
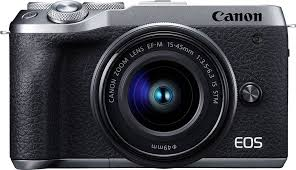
Pros:
- Flip-out screen
- Brilliant short quality
- Small, lightweight, and portable
- Autofocus
- Sensor screen
Cons:
- Quite expensive — 1000$
- For professional use
The camera is available on Amazon. It has useful touch screen, and is quick when it comes to autofocus and is often used in photography. Here is what one of the users shared:
“Auto-focus: Reasonably fast and very accurate.
Image resolution: 32.5mp is more than enough, especially given the sensor size.
Ergonomics: It is comfortable and small. It has three dials, you can use one for shutter-speed, one of aperture and one for exposure compensation (or ISO). It is fun and convenient to use in the manual mode. I also like the custom modes. I don't use back-button focusing much, but it is easy to set-up if you need.”
With that being said, you can choose a simpler camera if you are on a low budget.
3. Sony ZV-1
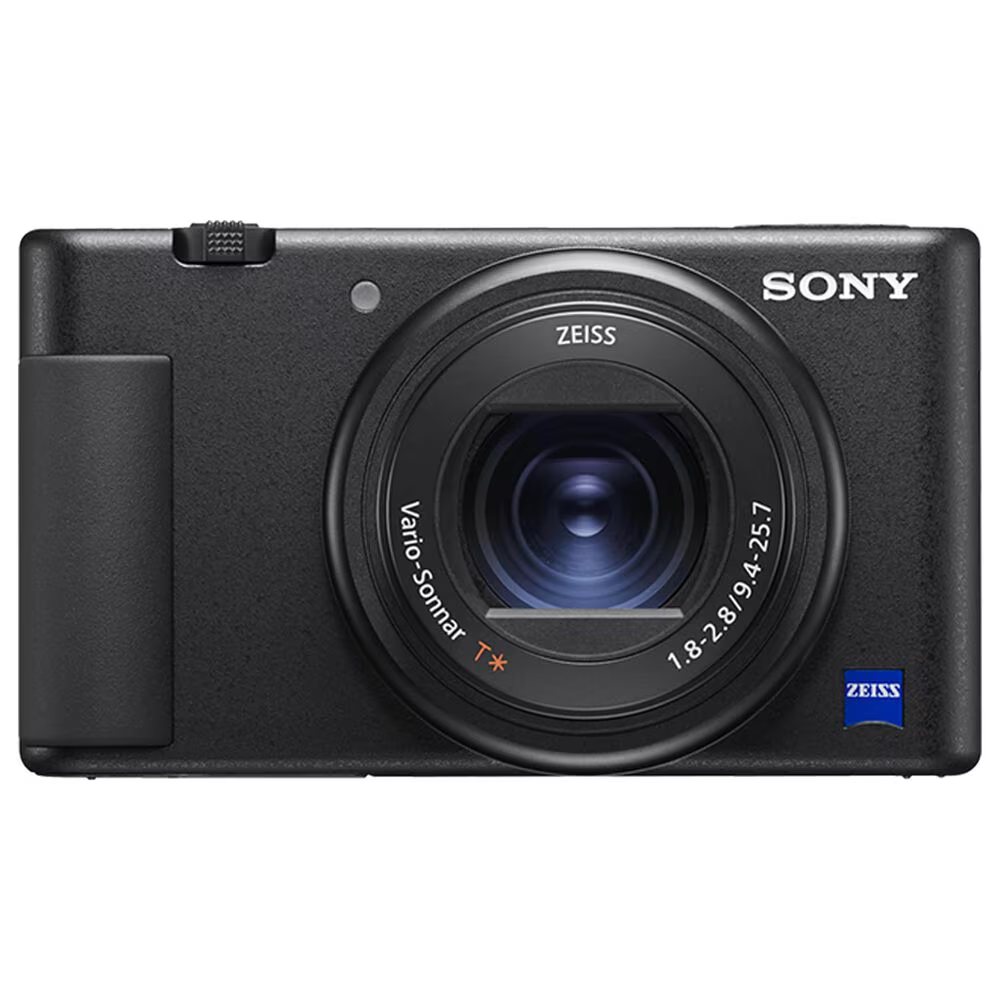
Pros:
- 4K resolution
- Small and portable
- Has Bluetooth and Wi-Fi connections
- Very good autofocus
- Created for bloggers and content creators specifically
Cons:
- It is a bit old-fashioned in terms of USB ports
- It may be complicated to work with for a beginner
Pricing: $749
This camera is also available on Amazon. One of the user reviews reads as follows:
“I am absolutely in love with my Sony ZV-1 Digital Camera! One of the standout features of this camera is the flip screen, which makes it incredibly easy to frame shots and capture perfect selfies or vlog footage. The touchscreen display is intuitive and responsive, adding to the overall user experience.
I also appreciate the built-in microphone, which delivers clear and crisp audio, eliminating the need for external microphones in most situations. The defocus setting is another favorite of mine, allowing me to achieve beautiful background blur and professional-looking shots effortlessly.”
It is a versatile choice for vlogging. However, you might face some battery life issues, as it loses battery quickly.
Best microphones for creating online courses
As we already mentioned, microphones are essential for a good quality online course production. A good microphone creates sharp sound, which adds so much quality to the video.
Whereas we had to learn from vloggers with video cameras, we'd better apply to our fellow podcasters for microphone choice. Here is what we gathered.
First, you need to make sure that your mic can be integrated with your other equipment. If you are using a laptop to record, you would want to use a microphone with a USB plug. It's a good choice for beginners.
There are microphones with XLRs that are of a higher standard. The quality is better, the price is higher, and you will need special equipment for connecting.
Let’s have a look at the top 3:
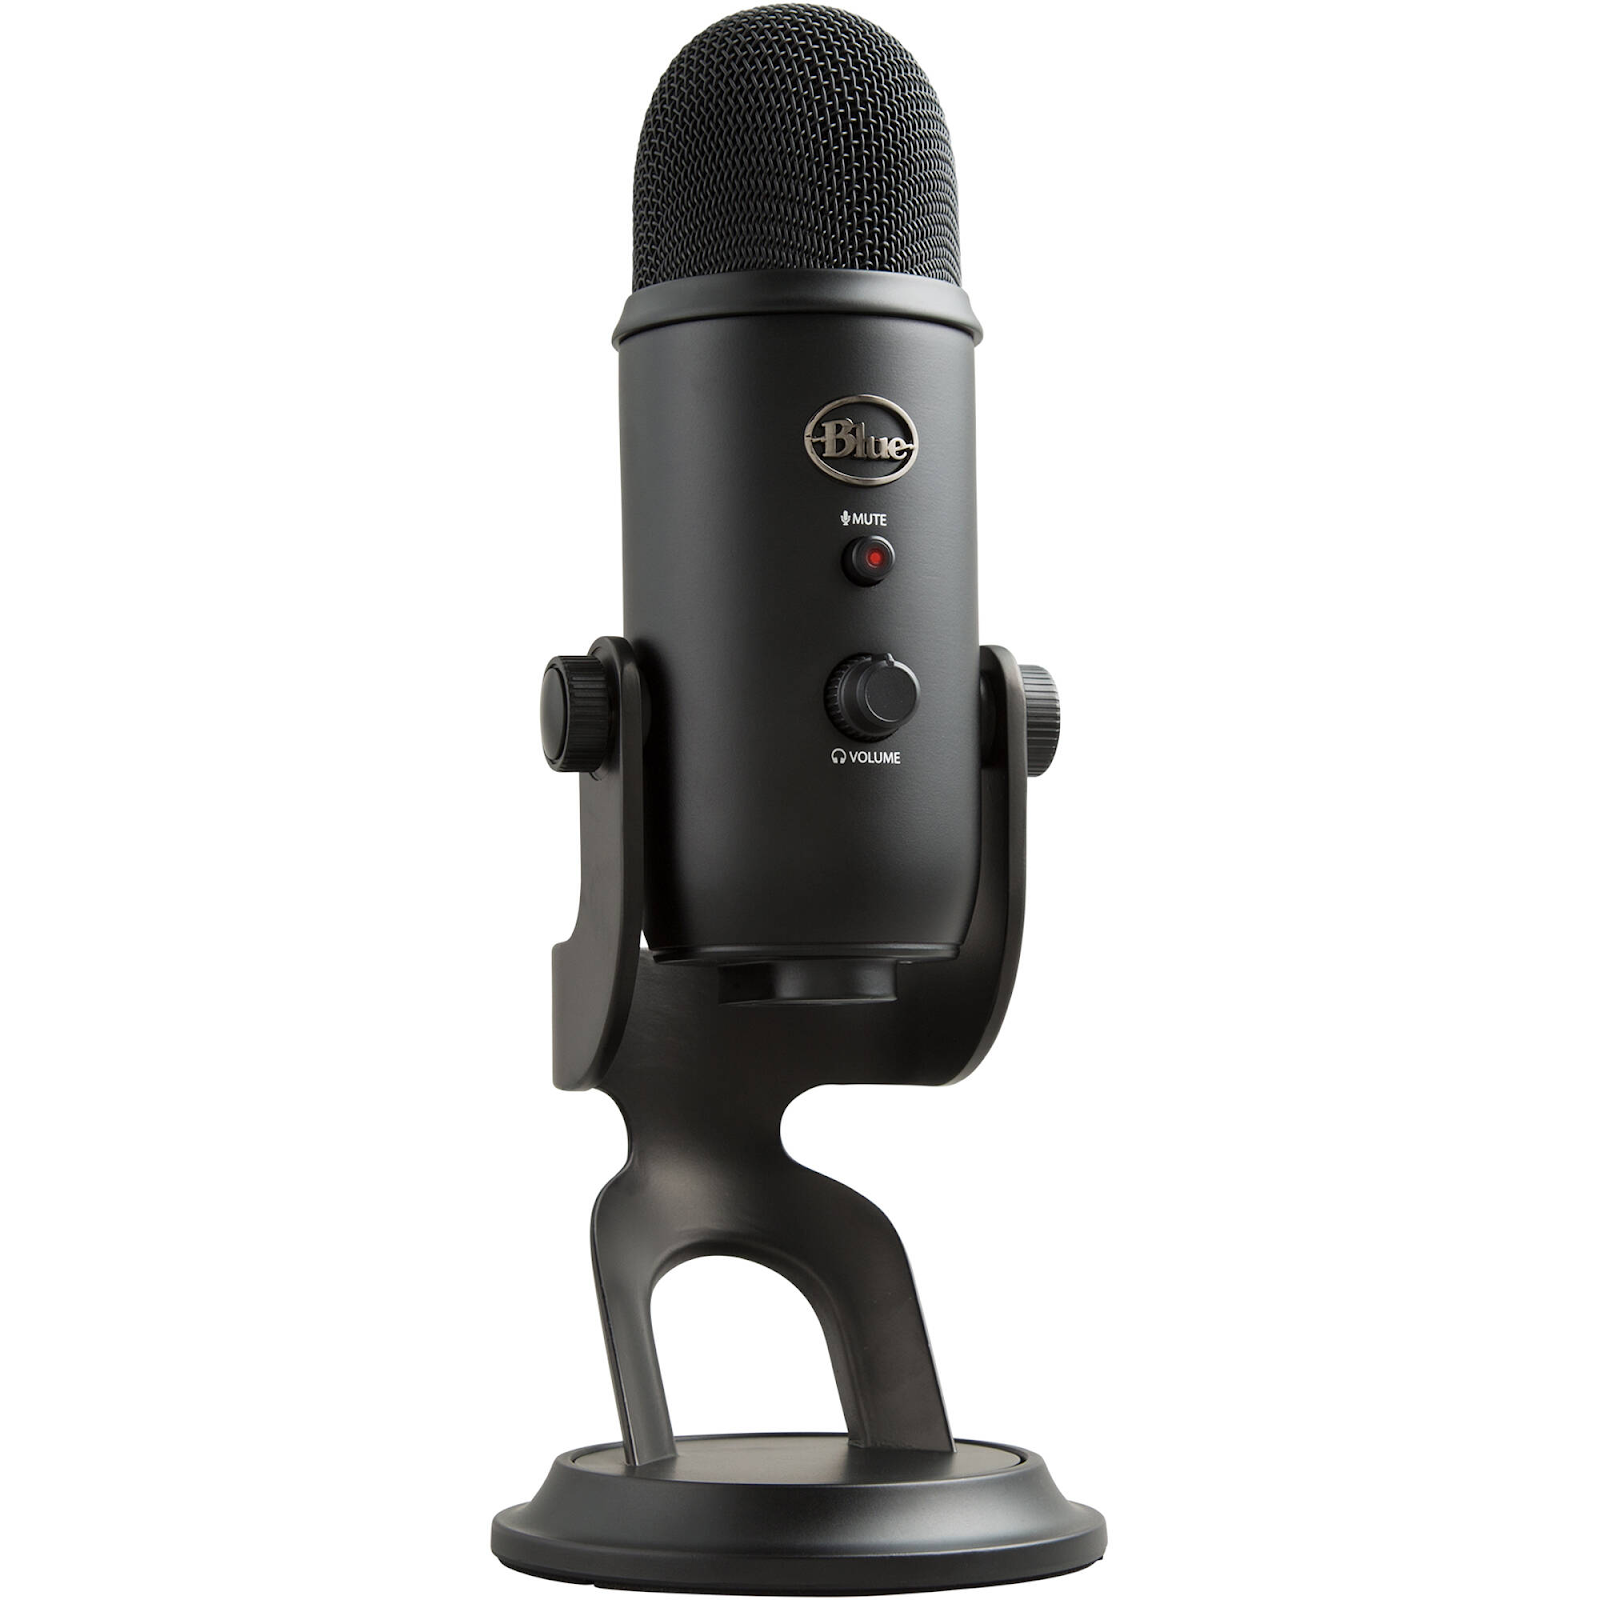
This one is cheap, provides extremely good quality for its price, has a USB connection, and is really indestructible. Depending on the type, you can find it from $80-$100.
Features:
- Clear broadcast vocal sound
- Audio control with instant mute, headphone volumes, etc
- Desktop stand included
It is now available on Amazon. One of the reviewers describes their experience with Blue Microphones Yeti as follows:
“ The sound quality is crystal clear, capturing every nuance of my voice with zero latency. The four polar patterns are incredibly useful, allowing me to switch between cardioid for solo recordings, bidirectional for interviews, omnidirectional for group podcasts, and stereo for a more immersive sound experience.
While this microphone doesn’t come with a camera, its performance more than makes up for it.”
2. Rode NT-USB
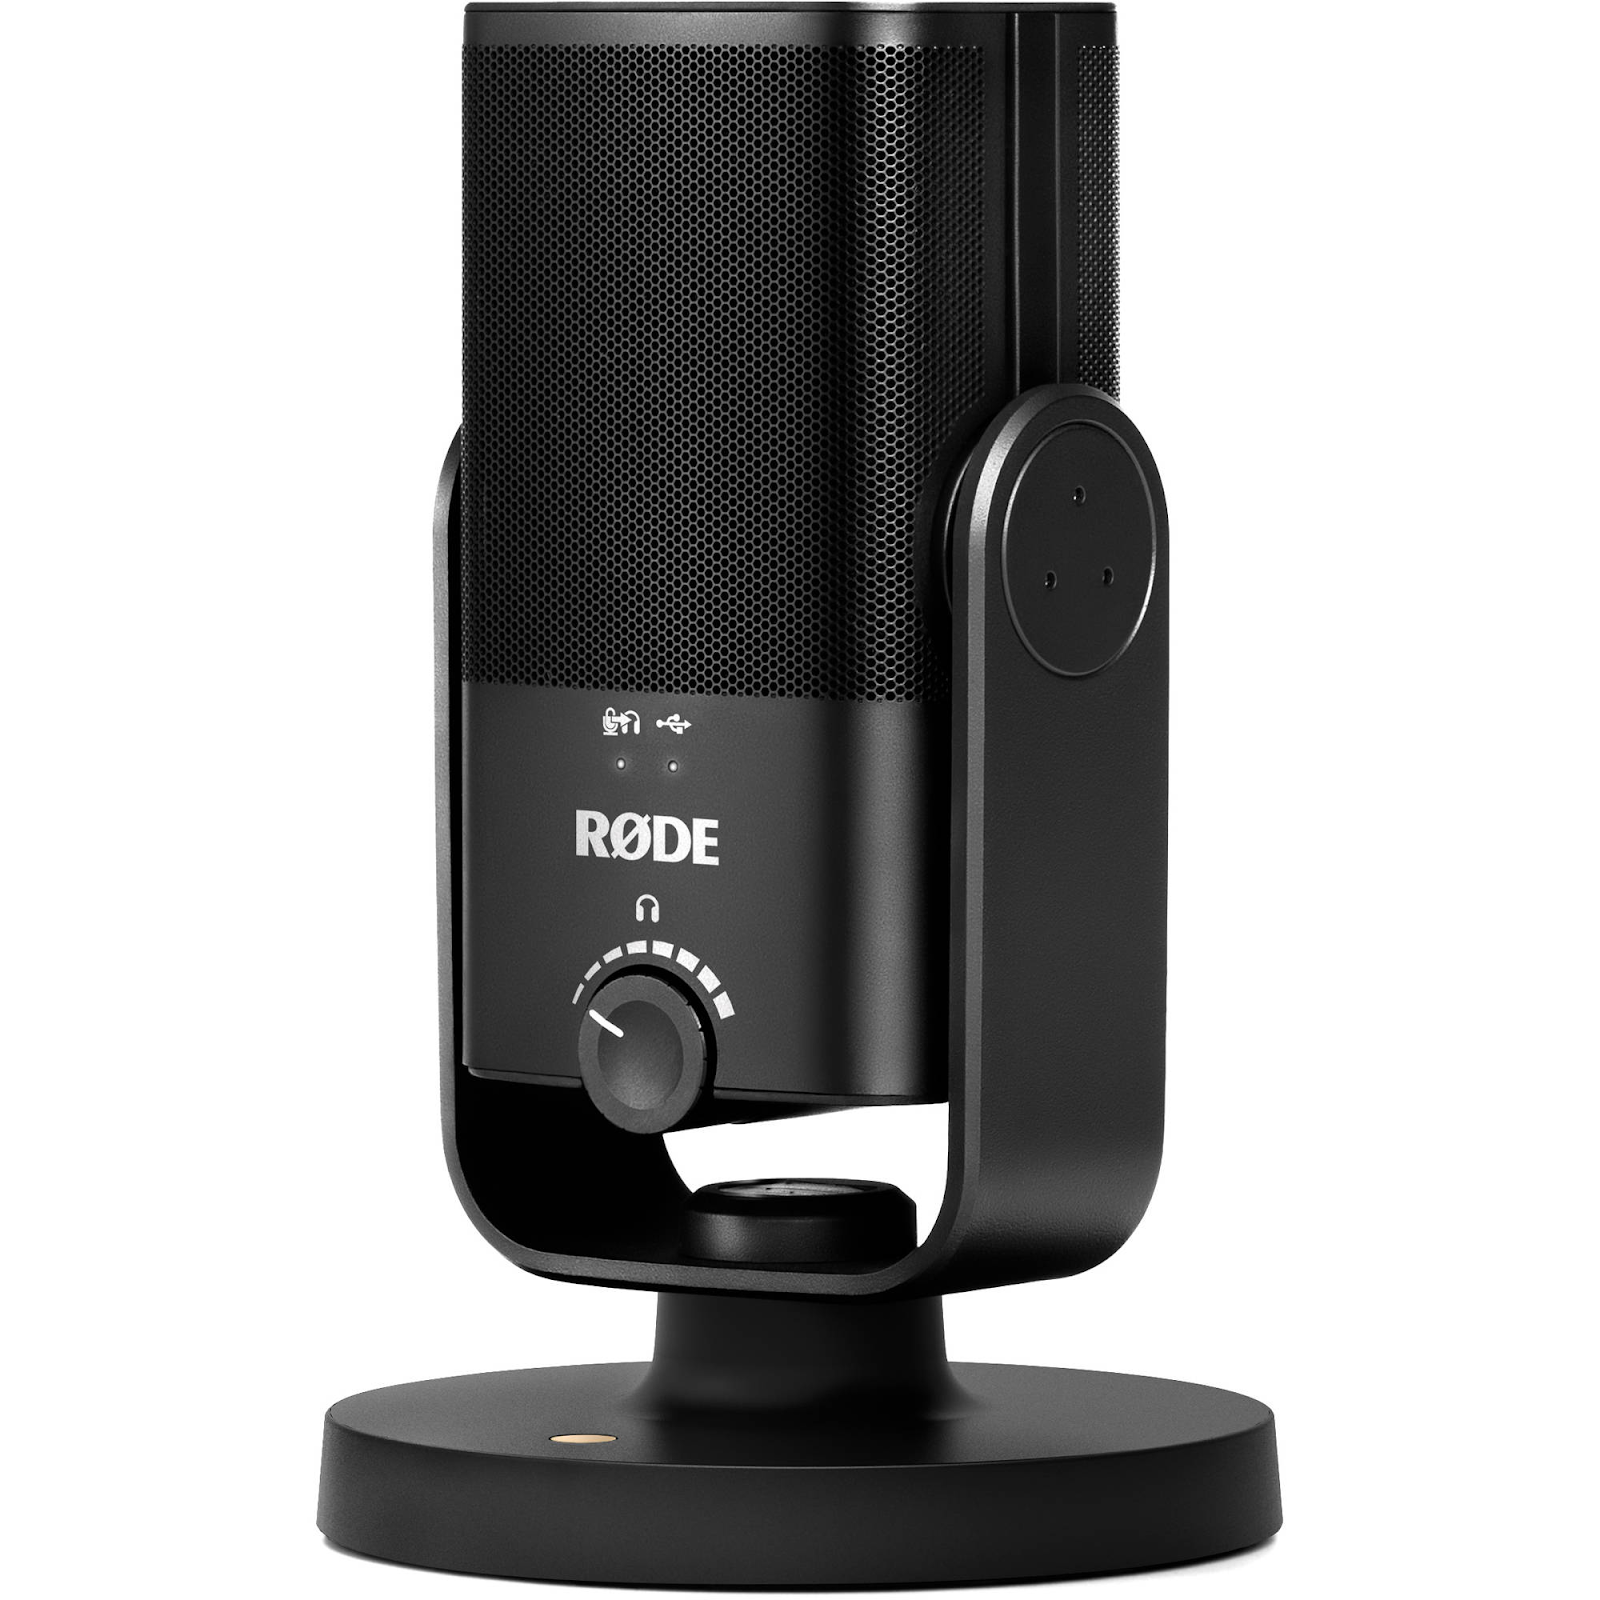
Rode will provide you with a clear and sharp sound, even better than that of the Blue Yeti. This one is a bit more pricy, though. It is also a USB-connected mic. In case you wonder, it costs $170.
Features:
- Connectivity to USB
- With tripod desk stand
- High-quality audio provided
You can purchase that on Amazon.
Users have left their honest reviews on this microphone.One of them mentions:
“I was using the Blue Yeti before which had good quality BUT quickly developed an issue where there was a high pitch whine whenever I spoke. I've owned this RODE mic for a few months and there is zero whine. The mic is pretty heavy. Maybe very slightly smaller and lighter than the YETI. The built in pop filter is nice since it's takes up so little space compared to a third party one.
My biggest con is I wish one of the knobs adjusted the pickup sensitivity.”
3. IK Multimedia iRig Mic HD 2.

This microphone gets integrated with literally everything with a USB plug. It has a tripod and a carrying pouch for convenience and is quite cheap too. And by saying cheap, we mean $130.
Features:
- Onboard gain control to adjust input levels
- Wide frequency response provided
- Volume control
A review from the user reads as follows:
“The mic works really well. Clear sound and it picks up very well. ”
Options for a low budget are covered further in this article.
If you don’t like these options, you can look at the larger scale. Brands like Shure, Audio-Technica, Sontronics, and Rode provide good-quality podcasting microphones.
Microphone lavaliers
Lavaliers are great when you are not in a studio or other kind of indoor environment. Lavaliers can be with cables or with Bluetooth: both are handy in different ways.
The cabled mic can cause a bit of a tangle, but you won't need to charge it. And it is usually cheaper. BlueTooth mics are more convenient during the process of exploitation, so keep that in mind.
Some good wired lavalier microphones are Rode SmartLav+, Sennheiser ME 2-II Omni, and Audio Technica AT829CW.
And here are some nice wireless ones: Sennheiser MKE 40, Shure MVL, and Sony ECM-44B.
So, if you do need microphone lavaliers, consider spending at least $100.
Special equipment
You should be aware of a couple of more miscellaneous things. Some of them are essential — you won't be able to do anything without them — some are recommended and highly insisted on.
#1 A computer.
You cannot even make a full recording if you don't have a PC or a laptop, not even speaking about editing and submitting your video courses. You probably already have a computer, but there are a few things to know, just in case you don't.
For Mac fans, MacBook Air would be just fine, but you better go for Pro if you need a more powerful machine. Additionally, maintaining your Mac's performance with reliable Mac cleaning software can help optimize its efficiency over time.
It is much more complicated with Windows since most computers have this OS. It is easier to start with a brand like HP, Lenovo, Dell, etc. Look at the processor's capacity and at the memory. Speaking of which, the third point:
The RAM ( random access memory) and ROM (read-only memory) should be voluminous in order for the programs to work. Otherwise, you will need to free up RAM constantly.
Considering these features, an average laptop for creating & editing courses will cost you about $600-$800. You can find options that are below and above the mentioned price.
#2 Drive
What about secondary memory? You will run out of space on your computer eventually. For that, you can use external memory holders, like hard drives. There are plenty of those of different prices and categories, so look for the one that suits your budget.
CloudDrive is also extremely useful and far more secure. You can't spill a cup of coffee on something without a physical manifestation. With a hard drive, though, that would've been a problem.
Many cloud storage providers offer quite a lot of MBs for free. So you can start purchasing if the storage isn’t enough for you.
#3 Sound Isolation
A good microphone is not enough for a good sound. You need to insert sound isolation panels in your studio. They are quite cheap and easy to put in. Not only will your students be grateful, but also your neighbors.
The average price for such panels is $40. So, add it to your list if you plan to acquire one.
Video editing software
So, we're done with the recording equipment. You filmed the video; you did the voiceover. Now, you need to put it all together and do it nicely. For that, you need editing software, and its choice will depend on several factors:
- Your budget.
- Your Operating System (e.g., Windows OS, Mac, Linux, etc.)
- Your level of integrity with complicated programs.
Let's start with the classic.
Adobe Premiere Pro is pliable for Windows and Mac. In good hands and careful use, this program will allow achieving a professional level of video quality. It is popular, works great, and is relatively simple to work with.
Premiere Pro is quite expensive. Plus, you would have to use a powerful computer or laptop for this with a lot of storage. If you want to pay monthly, it will cost about $31.50. There is an option for annual payment as well.
The second on the list is Final Cut Pro for those who prefer Mac devices. It is really easy to work with. Dare we say, it is beginner-friendly. But it has no version for Windows or Linux. You would also have to pay a lot for the program. If you are ready to pay $300, give it a go. It also has a 90-day free trial.
Another platform of Adobe group is Premiere Elements, which is just perfect for beginners. It even has guides for work and is not cluttered with complicated features. On the other hand, this is a bit of a downside since you will have to buy another program after you've upgraded your skills. And, as with any other Adobe product, it is neither free nor cheap. You can get it for $100.
Green Screens
A green screen is not necessary for an online tutoring course, but it can be helpful. If you want to add a virtual background to your videos, you might as well add a green screen to your shopping list. This is quite useful for those who don't have studios and instead shoot videos in their homes.
Here are the top three green screens for private use:
- Elgato Collapsible Chroma Key Panel. It is extremely convenient: it is portable and easy to build and use, but it's not cheap. You can have it for $200-$300.
- Neewer Chromakey Double-Sided Backdrop. This is a screen that is green on one side and blue on the other. Hence it provides a wider result. It is also very light, but then it is small. It will cost you up to $100.
- Web around Big Shot Office Chair Green Screen. As the name suggests, this green screen can be connected to your chair. It is small, tiny even, but very easy to use and also cheap. It costs around $50.
Make sure that you are lighting your screen up evenly. For that and other things, you would need a proper lighting system.
Lighting and accessories
You won't need much lighting equipment for in-studio or home shooting unless you're doing a green screen background that requires special attention.
You want to use cold white light close to natural light for online courses.
Ring lights are the best for stationary videos as they provide a smooth and soft natural lighting effect.
- Neewer LED Ring Light is a good way to start. It is cheap and effective. You may have it for $88-$114. You can put it on your desk behind your camera, and it'll work just fine.
- Razer Ring Light is more expensive, but then it provides more luminosity; generally, it is of a higher quality and opportunities.
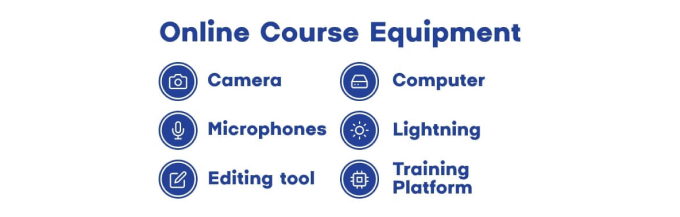
Online Course Equipment Based on Your Budget
Some of the equipment we discussed may still seem too pricey for you. Or vice versa. Maybe you were planning to purchase more advanced equipment. Let’s look at some online course gear that can fit your budget.
Starters or Limited Budget
Not many things & not much investment in equipment are required if you are just starting. There are some essentials, of course, while other materials can be either replaced or not be used at all.
This set is for a budget a little above $1000. And if you already have something from this list for course creators, lucky you!
- Computer/Laptop. Where would we be if it wasn’t for computers? That is why it opens our list. Even if your budget was extremely limited, you could use your laptop camera and audio recorder to create a course. But if we want quality on top of everything, we should use other devices as well. Considering that PCs are usually more expensive (You choose the brand!)
- Camera. You will need a good camera for sustainable video quality. However, there is an alternative to webcams too. You could just use your smartphone with a tripod. Add $400 or a tripod.
- Microphone. Finding a microphone that will be of good quality and not too expensive at the same time is not that hard. You can use a directional microphone starting from $85.
Mid Budget
If you are considering to get online course equipment with a budget of $3000 and more, here is a set for you.
- more advanced version as your laptop ($1000)
- a camera with more features (high resolution, autofocus, with a tripod, better shot quality, or any other features you may need) for $700-$1000.
- microphone (with better audio quality, with headphone $150 and more
Besides these, you can add the following:
- A standard ring light. You will need to invest more in lighting to ensure better video quality. One of the best options, as mentioned before, can be Razer Ring Light or Lume Cube Wireless ring light. If you are most likel they cost $250-$350.
- An all-in-one platform. A platform to create and sell courses is a necessity, even if you are on a budget. Investing in a platform is a wise choice. Why? Because you will be able to manage everything related to your course, starting from administrative work to course creation.
- Video editing software. It is not only about what you say and how you say it. It is also about how you present it. So a video editor software 50 will do perfectly.
High budget
The time will come when you will need more advanced and special equipment. Besides the above-mentioned, you can consider:
- Great lighting. It’s always great to film in the natural light. However, when you are in need, use special lighting as well. An example of a portable studio light is Godox ML-60. You can have it in your studio for about $310. It is not only a source of light. It comes-in and mute effects.
- Sound isolators. If you have this equipment, you will spend less time on post-production as there will also be less noise to clear. It will cost you almost $40.
- Mini video studio. Such kits come with green screen background, studio photography, and umbrella lighting. It provides an excellent setting for your course, no matter where you will be filming.
- Wireless presenter. If you plan to have presentations, you will need to acquire one.
And we are already past $4000.
All-in-one platform for launching the course
Finally, you will need a platform for launching your course. And you have to be careful here because your choice will influence:
- Your audience’s size
- The time you spend on optimizing your course site
- Convenience for your students, etc.
Uteach is the favorite platform for thousand of course creators. And do you know why? It provides rich features and affordable prices at the same time.
With Uteach, you can have your website set up fast. This becomes a reality due to lots of customizable templates and designs.
You can not only create and publish courses on your own website but make it SEO-optimized as well. The marketing tools will ensure your courses have high visibility. In case you want to conduct your courses in real-time or meet your students online, make use of live sessions.
Book a demo now and let our expert walk you through all the way of choosing the plan to set up.