How to connect to Google Search Console
Google Seach Console is a must-have tool for website owners. It plays an essential role in planning and performing the optimization process. It provides various insights into how Google crawls and indexes your website.
You can track the website’s search performance, which will foster improving its ranking and search visibility. Follow the steps below to add your website to the Google Search Console and get information on any errors or issues your website might have.
Steps to set up
Step 1. Go to Google Search Console and click on the Start now button.

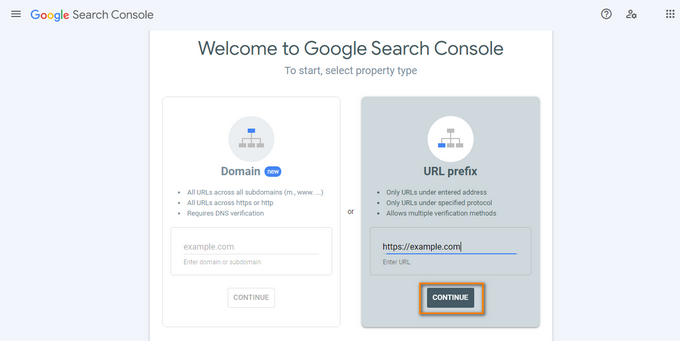
Step 2. Insert your website URL in the required box and click on Continue.
Step 3. Copy the HTML tag and insert it in the header script section of your dashboard.

After copying, access your dashboard, go to the Settings tab, and choose the Integrationssubtab.
Type <script></script>and paste your code into the Header scripts box.

Click on the Save changes button below.
As the ownership is verified, click on the Go to property button from the Search Console page.
Now you are ready to get started with Google Search Console.
Submitting a Sitemap
As you already accessed Google Search Console, go to the Sitemaps section from the navigation menu on the left.
You will see your website's URL in the Add a new sitemap section. Insert the following text “sitemap.xml/” in the box and click the Submit button.
Start exploring Google Search Console further to improve the website’s visibility in search results.
You can also watch the video to connect your website to Google Search Console.
If you have any questions about coupons, discounts, or anything at all, send us an email at [email protected] or click the blue icon below to chat 😊