How to create live sessions
As remote learning continues to be a necessity, live sessions have become a powerful tool for educators to engage and connect with their students.
Let’s have a look at how the live session-creating process works.
To access live sessions, follow these steps.
- Navigate to the Dashboard
- Go to the Live Sessions subtab.
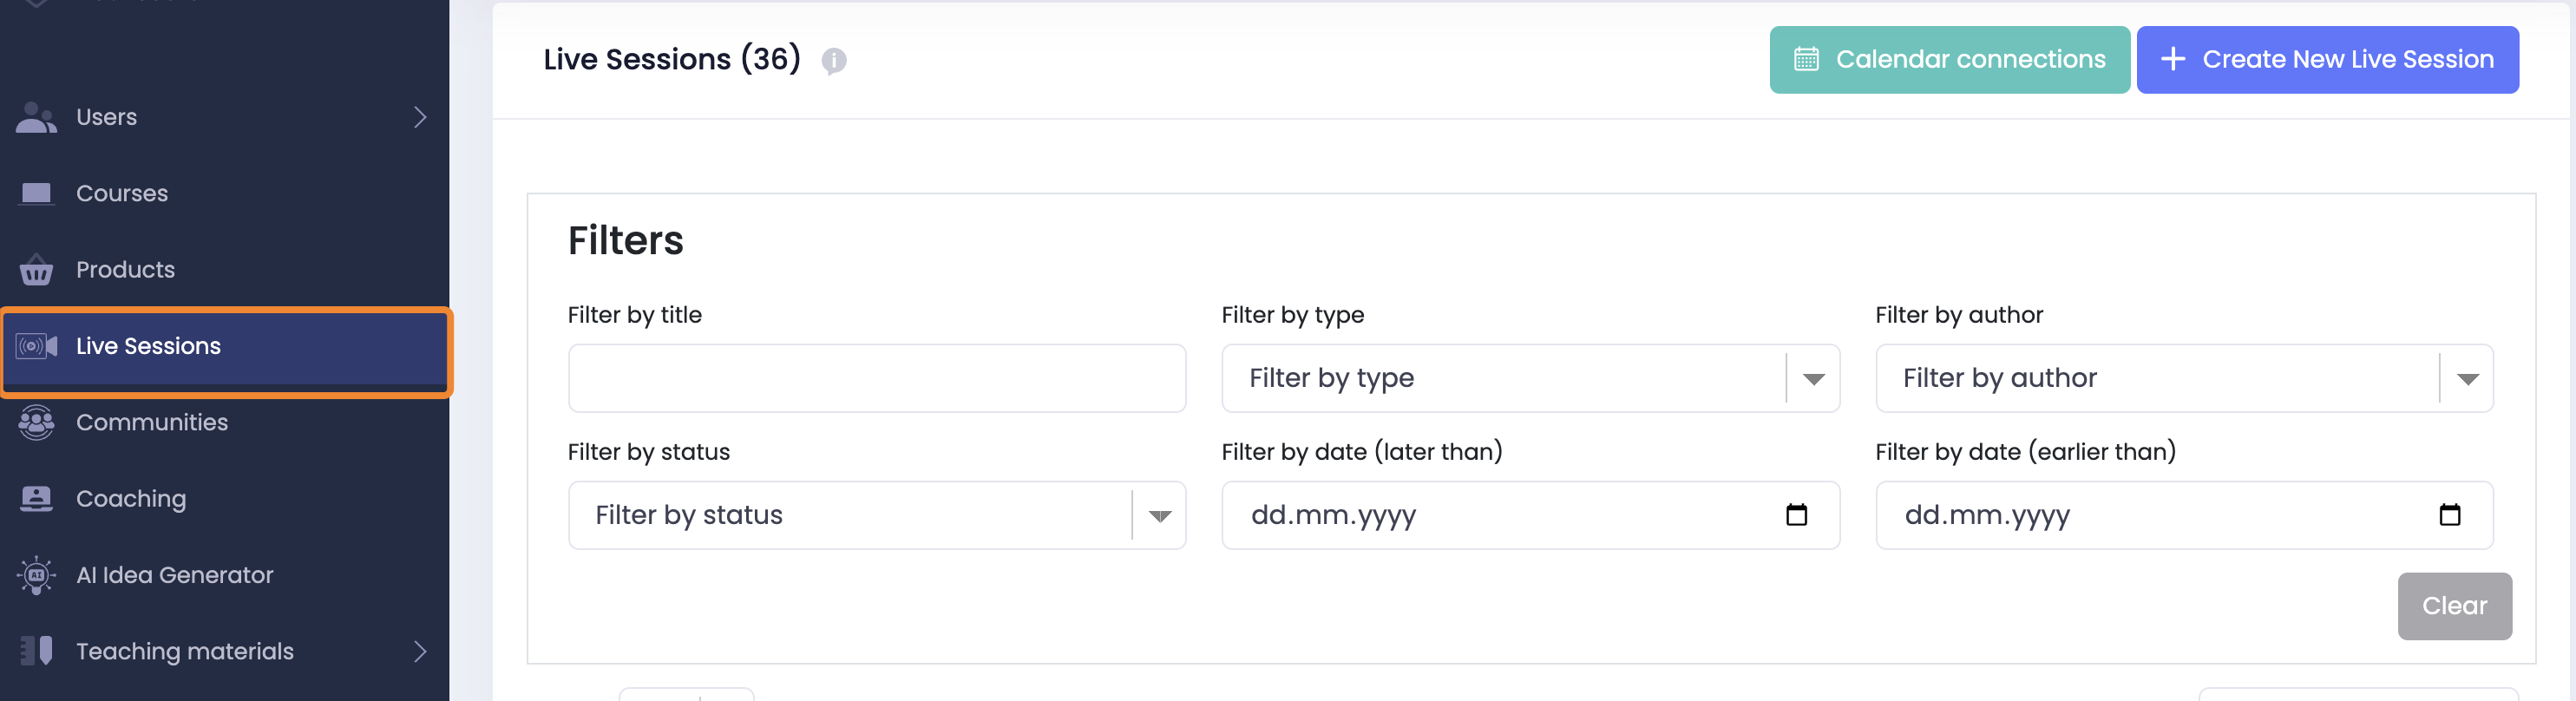
Here you can see the list of all your live sessions, calendar connections and filtering options.
The Filters panel allows users to quickly narrow down the list of sessions by applying a variety of criteria. This makes it easier to find specific sessions without having to scroll through the entire list.
Syncing with Your Calendar
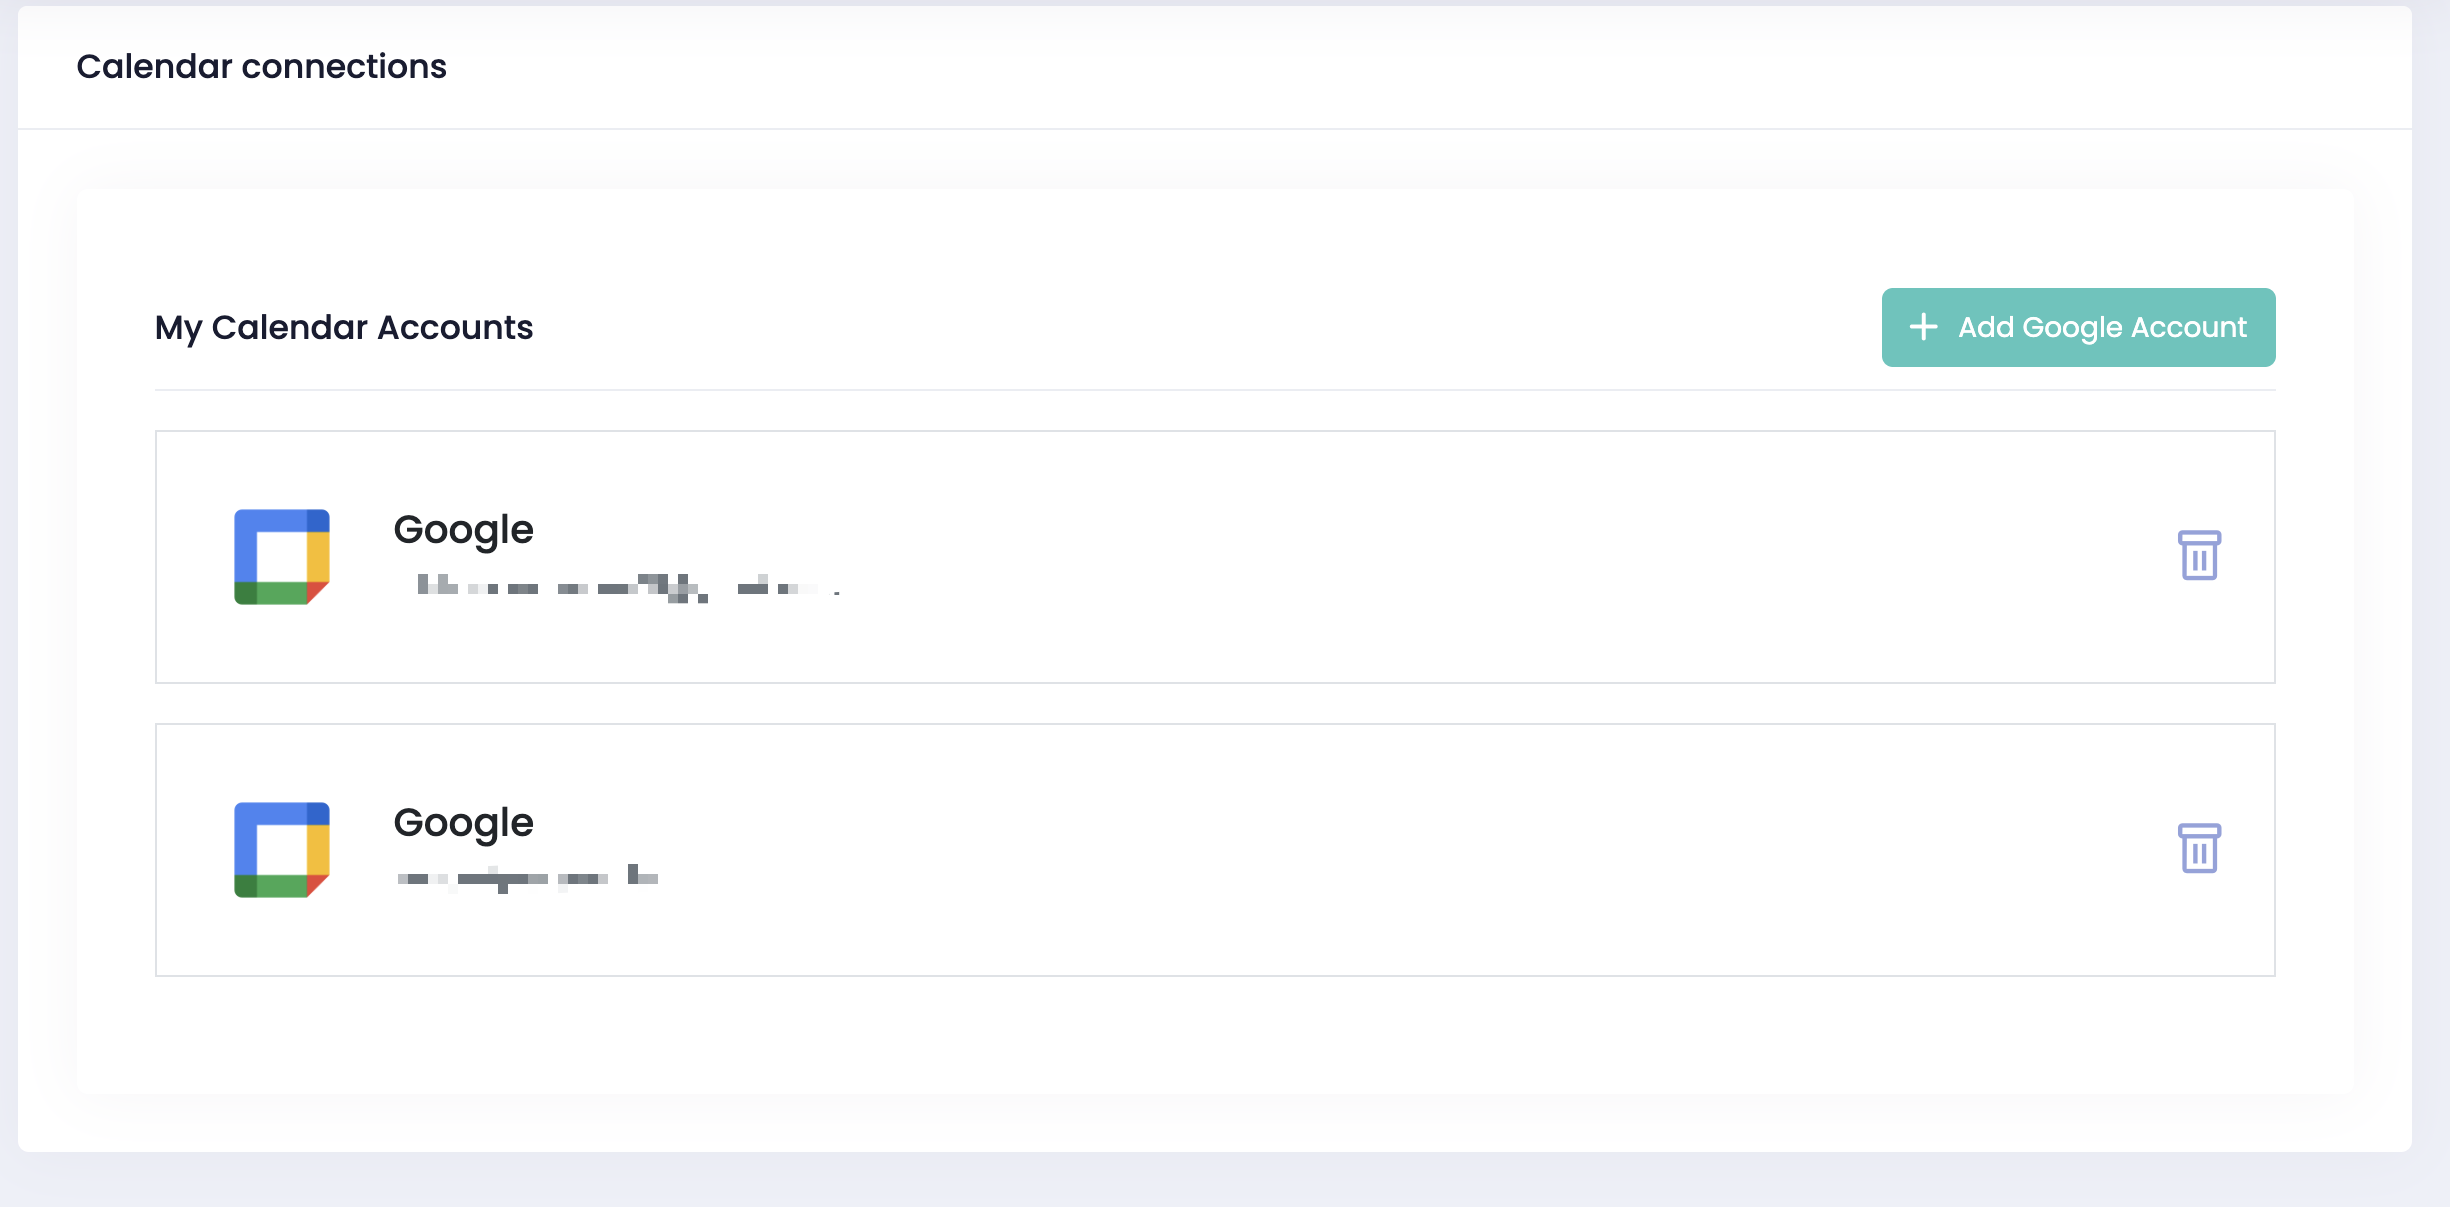
To stay organized and never miss a session, you can easily connect your Google Calendar using the Calendar Connections feature.
Start by clicking the Calendar connections button located in the top right corner of the Live Sessions page. This will take you to a screen where you can manage your calendar integrations.

To link a new calendar:
- Click the Add Google Account button.
- Follow the on-screen instructions to sign in and authorize access.
- Once connected, your Google Calendar will appear in the list under "My Calendar Accounts."
- You can connect multiple Google accounts and remove any of them at any time using the trash icon next to each entry.
This integration helps ensure your live sessions are automatically synced with your preferred calendar, making scheduling and reminders effortless.
To have a new session, click on the Create New Live Session button on the right.
General Information
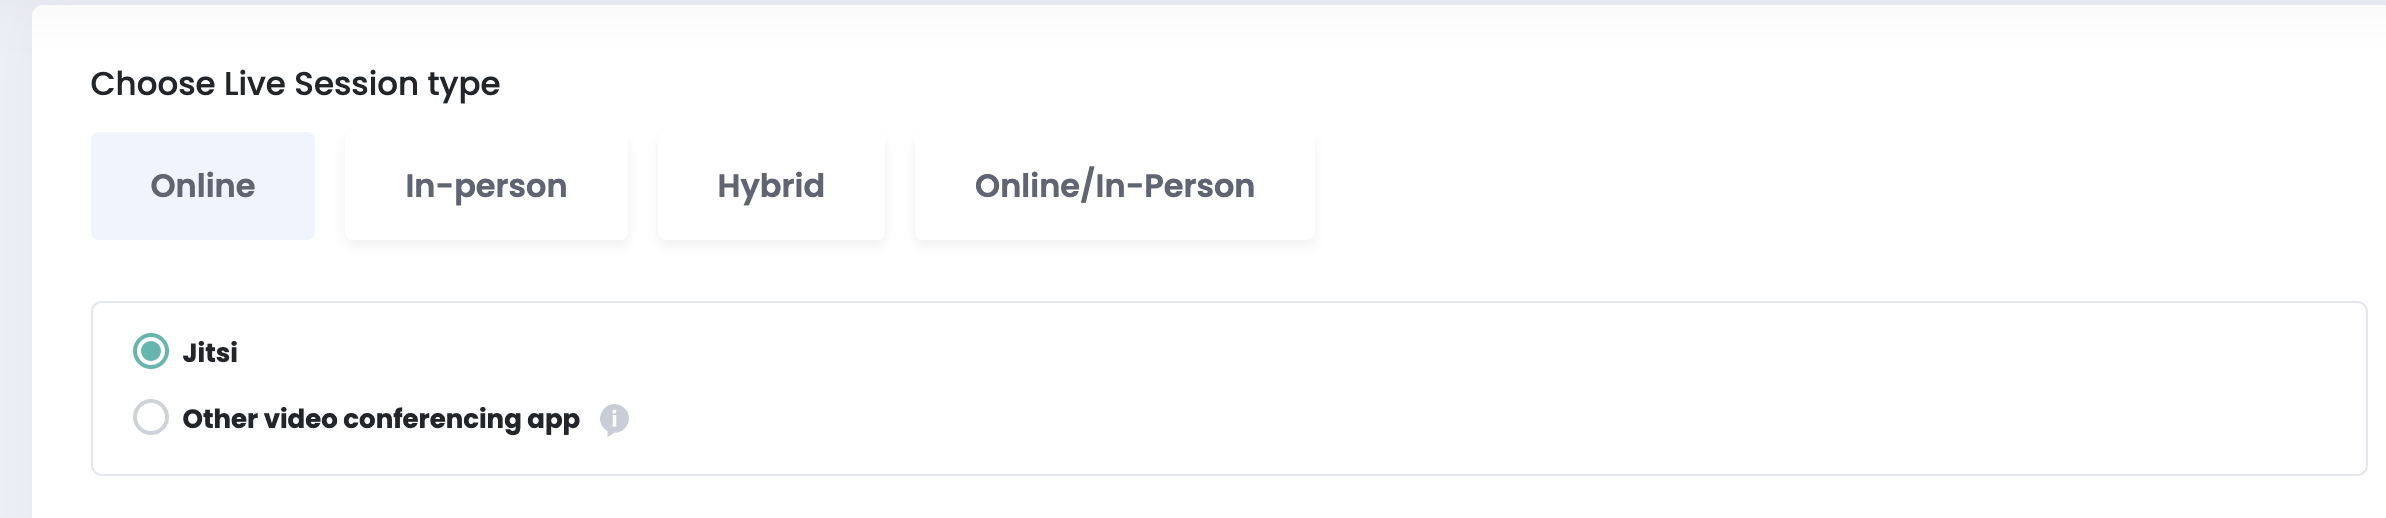
First, you need to choose the Live session type. The types include Online, In-person, Hybrid, and mixed Online/In-Person
Creating Online Live sessions
The first step to creating an online session is choosing the video conferencing app. The available options include
- Jitsi
- Other video conferencing apps - to access this, insert the URL of the meeting in the box below. You can put any link.;
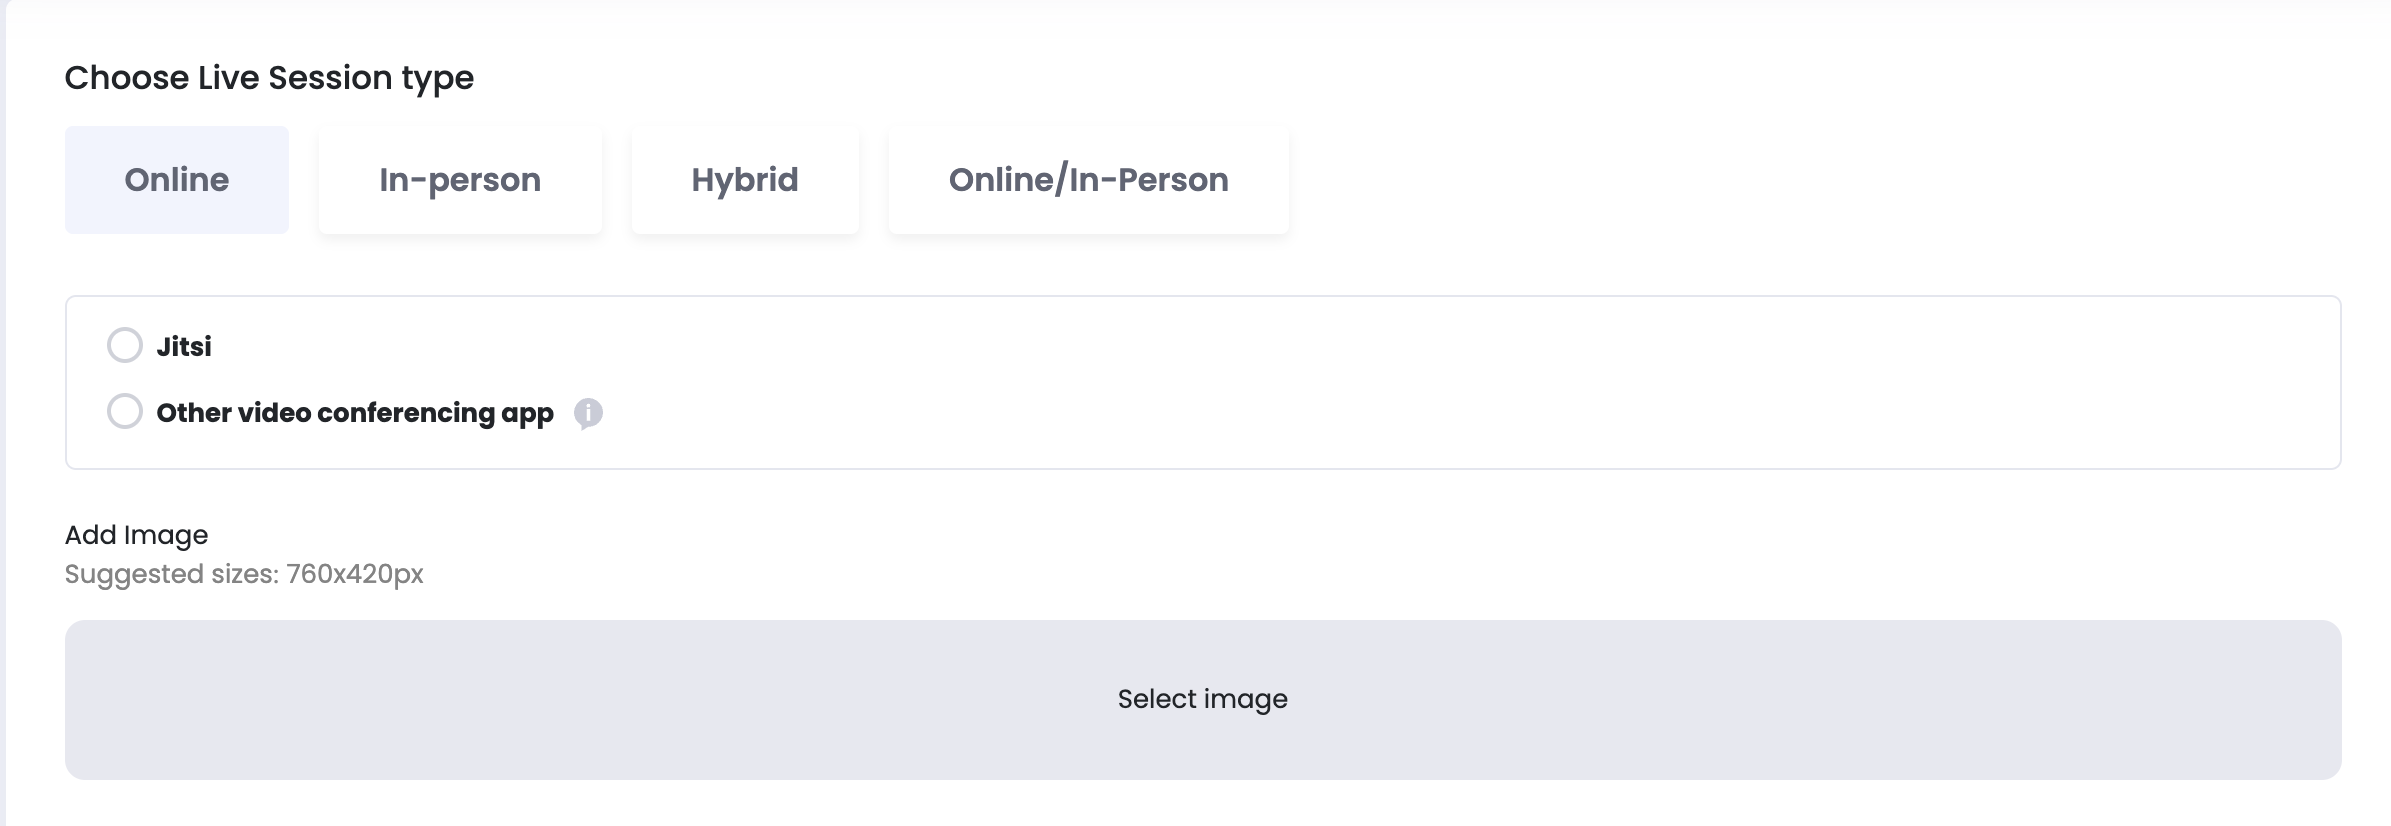
Now, choose an image to make the sessions visually appealing. The image should not exceed 760 x 420 px.

Time to fill in the details about the session.

Lesson Name - write a title for the lesson.
Speaker Name - include the speaker's name. If you haven’t created a speaker profile, tap on the section below.
Friendly URL - the URL will be automatically generated based on the inserted title. You can edit it if you want. After saving the changes, you will not be able to edit it anymore.
Description - add a few words about what your session will cover
What you’ll learn - give more details about the points discussed during the session.

Free - By activating this toggle, your lesson will be free and available for your website visitors.
Price - insert the price the session will be sold for
Old Price - fill in this box if you want to make a discount
Tax price - Tax info is just a note and doesn't affect the total price.
Number of participants - insert how many students will participate in the session.
Let us suppose you typed 50 in this box. When all 50 participants have already booked the session and a new person tries to book, the following message will be displayed:

Knowledge level - choose from the options in the list, including Beginner, Intermediate & Advanced.
Frequency
In terms of frequency, you also get several options to choose from.

- One day - choose this option if the session only takes place once. Add the details relating to the date, start & end time.

- Every day - choose this option if there is no need to customize specific dates. Write the start and end of the session in terms of the date and time.

- Weekly - if you choose this option, fill in the start and end information. Tick in the box of days of the week when the session will take place. If your session starts and ends at different times depending on the day of the week, activate the timetable toggle. Now you can customize the time for each day.

- Individual - choose this option and insert any date you would like the session to take place.

After you have chosen an option, click on the Save button.
Hide Dates- By activating this toggle,you can hide the dates of the session.
Creating In-person Live sessions
When opting for in-person sessions, you are required to provide a physical location for the meeting.

Creating Hybrid sessions
In the case of these two sessions, you need to choose a video conferencing app and add aphysical address.

Curriculum and materials
This is where you add all the materials for the session.
Click on the Curriculum & materials button.

You can add the text information, upload the video material, add the video URL, and attach file attachments. If there are any additional materials, you can attach them below. The supported files include Word, PDF, Excel, and PPT.
Attaching homework
If the session also requires homework, click on the Attach homework button.
Fill in the information, such as the video material, text material, and particular attachments. You also have the option to add a quiz.

If the list does not contain anything, create a quiz first.
Click on the Save and Go Ahead button below.
Certification
In this step, you can reward learners for completing the session by providing a certificate.
- Start by selecting a certificate template from the available designs. Click on your preferred style to highlight it.
- Next, set the required completion percentage. This determines the minimum amount of the lesson a student must complete to qualify for a certificate.
For example: Entering "80" means only students who finish at least 80% of the lesson will automatically receive a certificate.

Once configured, click Save to apply your settings. Certificates will be generated and delivered automatically at the end of the session for all eligible participants
Invitation & Enrollment
In the Invitation & Enrollment tab, you can easily grant students access to your lesson.
There are three ways to add participants:
Create a New Lesson Participant
Manually enter student email addresses and assign them to specific groups. This method is ideal for quickly adding a few participants.
Import Participants
Use the CSV template to upload a list of students in bulk. Simply download the template, fill in the student details, and upload the file using the "Choose file" button.
Invite Students
Similar to the manual method above, this also allows you to input student email addresses and assign them to groups—but sends an invitation directly.
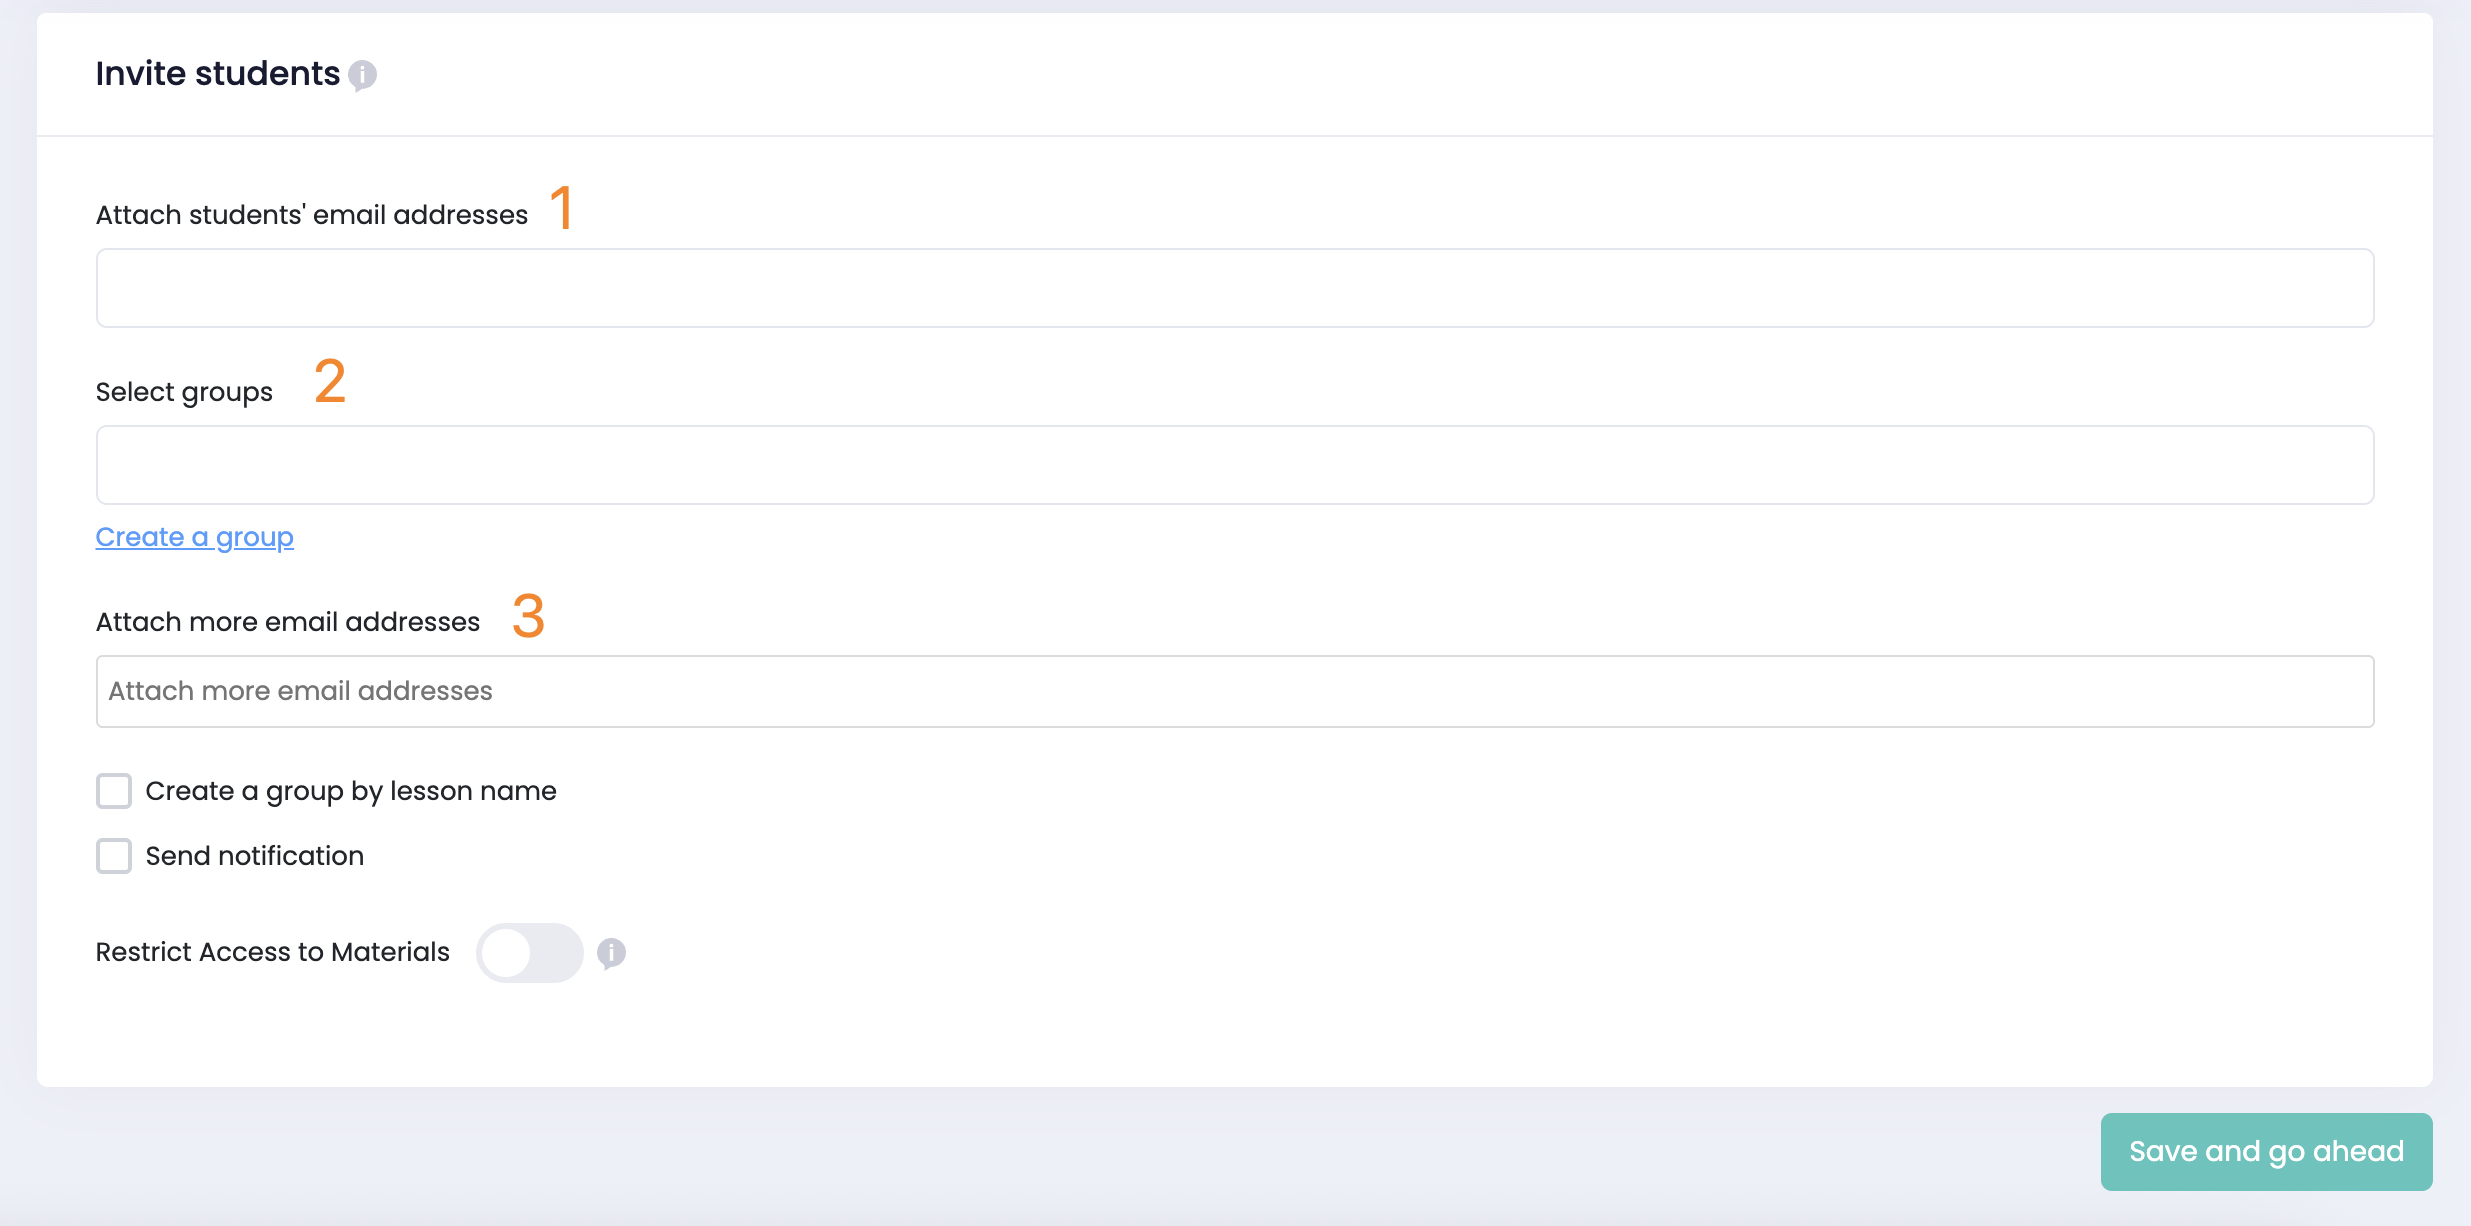
There are three options to add participants.
- Attach students’ email addresses - add participants from the registered students' list.
- Select groups - create a group of participants you want to add. For this option, tick the box near Create a group by lesson name.
- Attach more email addresses - add email addresses of particular students, including the ones who are not registered.
Create a group by lesson name, simply check the corresponding box if you want to create a group with this lesson.
Send notification box to notify the students about session updates.
The "Restrict access to materials" toggle allows you to control how long students can view lesson materials after the session concludes. Once enabled, you can specify the number of days students will retain access.

After you are done, click on Save and go ahead.
Publishing and SEO settings
Now, let’s choose the status and add some SEO details, after which the session can be published.
The first section allows you to set the status of the session.

- Draft - choose this option when the session is not ready for purchase
- Publish - choose this option so the students can access the session
- Unlisted - choose this option so only the students who have the link can access
- Private - choose this option to control the access manually
If your course is paid, you can change the post-purchase link.

If you offer live sessions with a free first session, you can now use "Enable Signup for Free Live Sessions" feature. This ensures students register before accessing free sessions, Without signup, students can join free sessions anonymously.
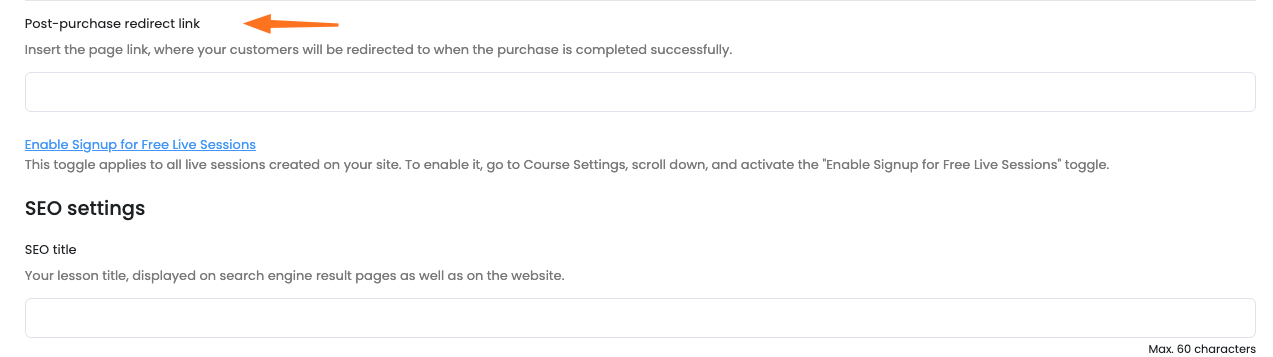
To enable this feature and start collecting student registrations, follow this guide.
Next up, we have the SEO settings section.

SEO title - this will show on the search engine results page
SEO description - below the title, searchers can read a short description
Lesson keywords - add some words or phrases that searchers can you in the queries so that they find your Live session on the search engine results page.
Voila! Now you are ready to publish the live session.
If you have any questions send us an email at [email protected] or click the blue icon below to chat 😊
Author![{"id":2,"user_id":25,"slug":"lusine-mkhitaryan","full_name":"Lusine Mkhitaryan","position":"Customer Support Specialist","tagline":"Customer Support Specialist","image":"uteach\/authors\/LxVlxPVHH6bKnNI51DR8-1743576946\/t02qfsy3cq2-u02u10sqk1q-727b0c81e36f-512.jpg","short_text":"I\u2019m a motivated Customer Support Specialist who thrives on making every customer experience smoother, more efficient, and more positive. \r\n\r\nI am dedicated to addressing customer needs with empathy, professionalism, and efficiency, always aiming to provide clear and effective solutions.\r\n\r\nMy approach emphasizes understanding the unique challenges customers face and finding creative ways to resolve them. I\u2019m passionate about streamlining support processes, optimizing workflows, and using innovative tools to deliver the best possible outcomes for customers.","education":"<ul><li>Bachelor's in English Language and Literature, Brusov State University\u00a0<\/li><li>Certified in Customer Service: Managing Customer Expectations<\/li><li>Certified in Innovative Customer Service Techniques<\/li><li>Certified in Working with Upset Customers<\/li><\/ul>","experience":"<ul><li>Customer Support Specialist at Uteach\u00a0<\/li><li>Digital Marketing Specialist at Munich Ventures\u00a0<\/li><li>Learning Platform Coordinator at WooChess\u00a0<\/li><li>E-commerce Administrator at Hafo.am\u00a0<\/li><li>Content Writer at Armenia Discovery<\/li><\/ul>","social_insta":null,"social_fb":null,"social_twitter":null,"social_linkedin":"https:\/\/www.linkedin.com\/in\/lusine-mkhitaryan","meta_title":"Lusine Mkhitaryan | Uteach Authors","meta_keywords":null,"meta_description":null,"json_ld":"{\r\n \"@context\": \"https:\/\/schema.org\",\r\n \"@type\": \"Person\",\r\n \"name\": \"Lusine Mkhitaryan\",\r\n \"jobTitle\": \"Customer Support Specialist\",\r\n \"worksFor\": {\r\n \"@type\": \"Organization\",\r\n \"name\": \"Uteach\",\r\n \"url\": \"https:\/\/uteach.io\"\r\n },\r\n \"alumniOf\": {\r\n \"@type\": \"EducationalOrganization\",\r\n \"name\": \"Brusov State University\"\r\n },\r\n \"hasCredential\": [\r\n {\r\n \"@type\": \"EducationalOccupationalCredential\",\r\n \"name\": \"Customer Service: Managing Customer Expectations\"\r\n },\r\n {\r\n \"@type\": \"EducationalOccupationalCredential\",\r\n \"name\": \"Innovative Customer Service Techniques\"\r\n },\r\n {\r\n \"@type\": \"EducationalOccupationalCredential\",\r\n \"name\": \"Working with Upset Customers\"\r\n }\r\n ],\r\n \"knowsAbout\": [\r\n \"Customer Support\",\r\n \"Workflow Optimization\",\r\n \"Support Automation\",\r\n \"Empathy in Service\",\r\n \"Conflict Resolution\"\r\n ],\r\n \"sameAs\": [\r\n \"https:\/\/www.linkedin.com\/in\/lusine-mkhitaryan\/\"\r\n ]\r\n}","created_at":"2025-01-24T16:10:14.000000Z","updated_at":"2025-04-24T22:38:45.000000Z"}](https://d35v9chtr4gec.cloudfront.net/uteach/authors/LxVlxPVHH6bKnNI51DR8-1743576946/t02qfsy3cq2-u02u10sqk1q-727b0c81e36f-512.jpg)